Image Editor
Helpinator has built-in image editor that allows you to add arrows, boxes with text and other useful content to images in the project’s image library.
Image editor is fairly simple to use. The figure below explains pretty much everything. Select shape style (or “None” if you do not need it), shape on the toolbar and drop it somewhere.
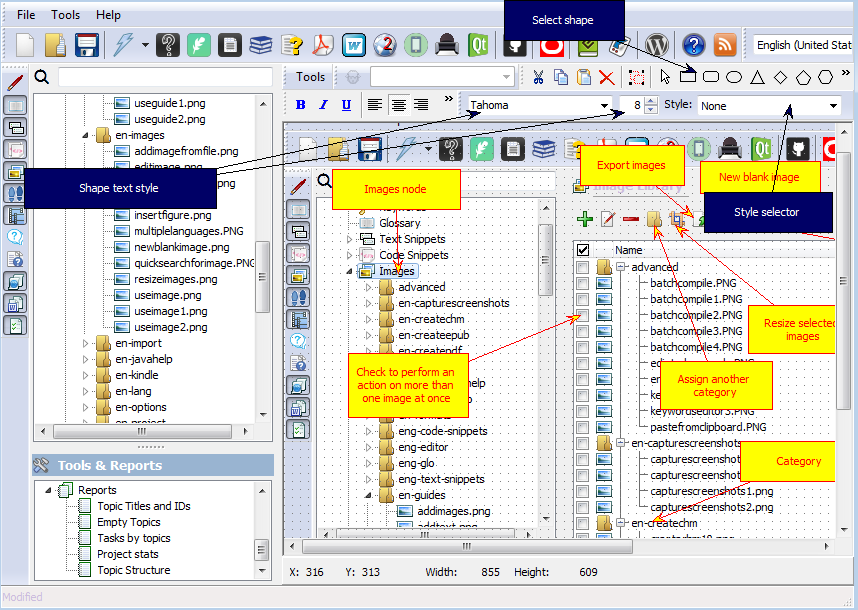
Image editor explained
The “Tools” menu of the image editor has some handy commands you can use:
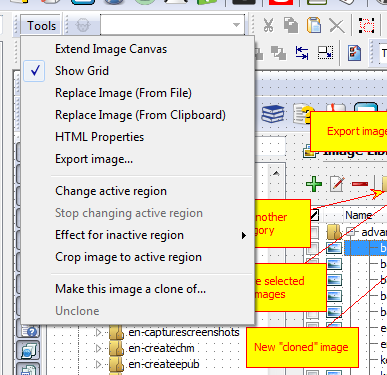
Image editor tools
- Extend image canvas - allows to make a screenshot larger by adding extra blank space.
- Show grid - shows shape alignment grid - disable it if it annoys you.
- Replace Image (From File) - replace the image bitmap/background using the selected file. Shapes will stay intact.
- Replace Image (From Clipboard) - replace the image bitmap/background using the image currently in the Clipboard. Shapes will stay intact.
- Export image - save image to file, with all shapes rendered over bitmap.
- Change active region - allows to define “active” region of the image. Active region limits the area where you can place shapes and allows to apply some effects to the space outside of it (darken, blur, crop).
- Stop changing active region - disables active region resizer.
- Effect for inactive region - allows to select an effect that you want to apply to the area outside of the active region (keep it as is, blur, darken, crop).
- Crop image to active region - crop the image so it will match the defined active region. Basically it is just “Crop” command from any other image editor. Operation is irreversible! Not applicable to cloned images.
- Make this image a clone of… - allows to change the donor of the cloned image or turn the image into a cloned one.
- Unclone - break the link between the clone and donor, the image will no longer update automatically when the donor image updates.